Last Judge Boss Fight Guide - Hollow Knight: Silksong
The Last Judge stands as the climactic encounter of Act 1, representing a crucial test of all skills learned throughout your journey in Hollow Knight: Silksong. This massive boss requires mastery of positioning, timing, and arena control to defeat. Victory opens the Grand Gate and grants access to the Citadel, marking your transition into the game's second act.
Boss Overview & Significance
The Last Judge serves as both a skill check and a narrative climax, combining elements from previous encounters while introducing unique mechanics. This encounter tests:
- Arena awareness - Managing positioning in a large, complex battlefield
- Multi-phase adaptation - Adjusting strategies as the fight evolves
- Resource management - Balancing aggression with survival over an extended fight
- Pattern mastery - Recognizing and countering varied attack sequences
- Endurance - Maintaining focus and execution through a lengthy encounter
Success against the Last Judge demonstrates readiness for Silksong's more challenging second half.
Location & Summoning Requirements
Accessing the Fight
The Last Judge isn't encountered through normal exploration but must be summoned through a specific sequence:
- Reach the Grand Gate - Progress through Blasted Steps to access this key location
- Find the Pilgrims - Locate the gathering of NPCs at the Grand Gate's base
- Speak to Each Pilgrim - Exhaust their dialogue to understand the summoning ritual
- Obtain the Needolin - Acquire this special instrument (location varies by route)
- Play the Summoning Song - Use Needolin to call forth the Last Judge
Pre-Fight Preparation
Before attempting the summoning, ensure you have:
- Maximum Health - Collect all available mask shards for survivability
- Weapon Upgrades - At least 2-3 needle enhancements for damage output
- Mobility Tools - All dash and movement abilities obtained so far
- Healing Items - Stock up on restoration options
- Optimal Loadout - Crests configured for extended boss combat
Complete Arena Analysis
Arena Layout
The Grand Gate provides a unique circular battlefield with distinctive features:
Central Platform
- Primary fighting space with stable footing
- Last Judge's preferred positioning area
- Safe zone during certain attacks
Outer Ring Platforms
- Elevated positions for tactical advantage
- Escape routes during overwhelming attacks
- Optimal positioning for ranged strategies
Environmental Elements
- Moving platforms that shift throughout fight
- Destructible terrain that changes over time
- Light sources that affect visibility and mechanics
Hazard Management
- Falling Debris: Arena destruction creates falling objects
- Platform Collapse: Some surfaces become unreliable mid-fight
- Light Dynamics: Changing illumination affects attack visibility
- Space Contraction: Arena effectively shrinks as fight progresses
Phase-by-Phase Strategy Guide
Phase 1: Initial Encounter (100-75% Health)
Behavior Pattern
- Slow, deliberate attacks with long windups
- Predictable slam sequences
- Generous recovery windows for punishment
- Limited mobility and area control
Optimal Strategy
- Study attack patterns without taking unnecessary risks
- Establish comfortable spacing ranges
- Practice timing for punish opportunities
- Build confidence with consistent, safe damage
Key Attacks
- Ground Slam: Telegraphed AoE with safe spots at medium range
- Sweep Attack: Horizontal coverage, avoided by jumping or backing away
- Bell Resonance: Audio cue precedes most major attacks
Phase 2: Aggressive Transition (75-50% Health)
Behavior Changes
- Faster attack sequences with reduced windups
- Begins chaining attacks together
- Introduces area denial mechanics
- More active positioning and pursuit
Strategy Adaptation
- Tighten defensive timing - less margin for error
- Focus on confirmed punishes rather than maximum damage
- Begin utilizing platform mobility for positioning
- Monitor resources more carefully
New Attack Patterns
- Combo Slams: Multiple impacts requiring repositioning
- Pursuit Mode: Active chasing with dangerous pressure
- Arena Interaction: Environmental destruction begins
Phase 3: Desperation Phase (50-25% Health)
Escalated Mechanics
- Significantly faster attack cadence
- Environmental hazards become prominent
- Limited safe positions in shrinking arena
- Complex attack combinations
Survival Strategy
- Prioritize perfect dodges over damage opportunities
- Utilize arena verticality for escape options
- Maintain healing resource availability
- Accept longer fight duration for safety
Critical Attacks
- Rage Sequence: Extended combo requiring sustained evasion
- Arena Collapse: Environmental destruction limits movement
- Berserker Mode: Reduced recovery windows between attacks
Phase 4: Final Stand (25-0% Health)
Ultimate Challenge
- Maximum attack speed and frequency
- Minimal safe positions remaining
- Environmental hazards at peak danger
- Requires perfect execution of learned patterns
Victory Strategy
- Apply mastered patterns with precision timing
- Use every available mobility option
- Make decisive moves - hesitation is punishing
- Stay calm despite overwhelming pressure
Optimal Combat Strategies
Movement & Positioning
Core Principles
- Constant Motion: Staying static invites punishment
- Platform Awareness: Know escape routes at all times
- Range Management: Maintain optimal distance for your weapon
- Center Control: Fight for advantageous positioning
Advanced Techniques
- Bait and Switch: Draw attacks to create openings
- Platform Dancing: Use elevation changes for safety
- Predictive Positioning: Anticipate attack sequences
- Emergency Escapes: Always have backup movement options
Damage Optimization
Punish Priority
- Ground Slam Recovery: Longest and safest damage window
- Combo Endings: Brief but reliable openings
- Arena Interaction: Vulnerability during environmental attacks
- Phase Transitions: Momentary confusion periods
Weapon Considerations
- Range Advantage: Longer weapons reduce risk
- Speed Priority: Fast attacks fit limited windows
- Consistency: Reliable hits beat maximum damage
- Versatility: Multiple attack options for different situations
Advanced Boss Mechanics
Bell System Understanding
The Last Judge's bell plays a crucial role in its attack patterns:
- Audio Cues: Different tones indicate specific attacks
- Timing Mechanism: Bell rhythm correlates with attack speed
- Environmental Trigger: Resonance affects arena elements
- Player Advantage: Learning bell language provides prediction
Phase Transition Triggers
Understanding what causes phase changes:
- Health Thresholds: Specific damage amounts trigger evolution
- Time Pressure: Extended fights may accelerate phases
- Arena State: Environmental destruction influences behavior
- Player Position: Proximity can affect aggression levels
Common Challenges & Solutions
Overwhelming Pressure
Problem: Fight intensity becomes unmanageable Solution: Focus on survival over damage, extend fight duration Prevention: Practice defensive techniques, know safe positions
Resource Depletion
Problem: Running out of healing during extended encounter Solution: Identify safe healing windows, prioritize efficiency Prevention: Conservative resource use, pattern mastery reduces damage
Phase Transition Confusion
Problem: Unable to adapt quickly to behavior changes Solution: Recognize transition triggers, have strategy prepared Prevention: Study each phase separately, practice transitions
Arena Limitation
Problem: Shrinking battlefield restricts movement options Solution: Adapt to smaller space, use vertical movement Prevention: Plan for space constraints, practice compressed combat
Rewards & Story Impact
Immediate Rewards
- Massive Geo Gain: Substantial currency for major purchases
- Unique Items: Special rewards exclusive to this encounter
- Skill Mastery: Advanced combat techniques developed
- Achievement Progress: Major milestone completion
Story Progression
- Grand Gate Opening: Access to previously locked areas
- Act 2 Beginning: Entry into Citadel and new regions
- Character Development: Major narrative advancement
- World State Change: Pharloom transforms after victory
Long-Term Benefits
- Confidence Building: Proves capability for harder encounters
- Technique Library: Skills apply to all future boss fights
- Strategic Thinking: Complex encounter management abilities
- Pattern Recognition: Advanced attack reading capabilities
Frequently Asked Questions
Q: What's the minimum recommended preparation for this fight? A: At least 7-8 masks, 3+ needle upgrades, and mastery of all movement abilities obtained so far. This is a significant difficulty spike.
Q: Can I leave and return if the fight goes poorly? A: No, once summoned, the Last Judge must be defeated or you'll need to re-summon using the full ritual sequence.
Q: How long does this fight typically last? A: Expect 8-12 minutes for first-time victories, with experienced players completing it in 4-6 minutes.
Q: Are there any environmental elements I can use to my advantage? A: Yes, platform positioning and understanding arena destruction patterns provide strategic advantages.
Q: What happens if I run out of healing items? A: The fight has specific safe healing windows - learning these is crucial for resource management.
Related Guides & Preparation
- Grand Gate Access: How to reach the Last Judge summoning location
- Needolin Acquisition: Finding and using the summoning instrument
- Act 1 Completion: Preparing for the Citadel transition
- Advanced Combat: Mastering complex boss mechanics
- Resource Management: Optimizing healing and ability usage
The Last Judge represents the culmination of Act 1's challenges and your gateway to Silksong's greater mysteries. Master this encounter to prove your readiness for the trials ahead.
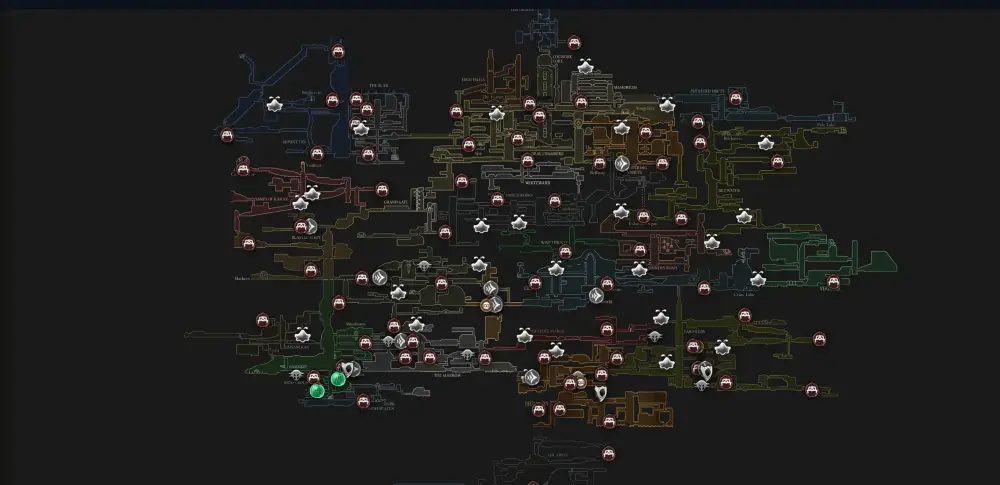
Open Interactive Map (All Areas)
Opens the full interactive Silksong map in a new tab.


