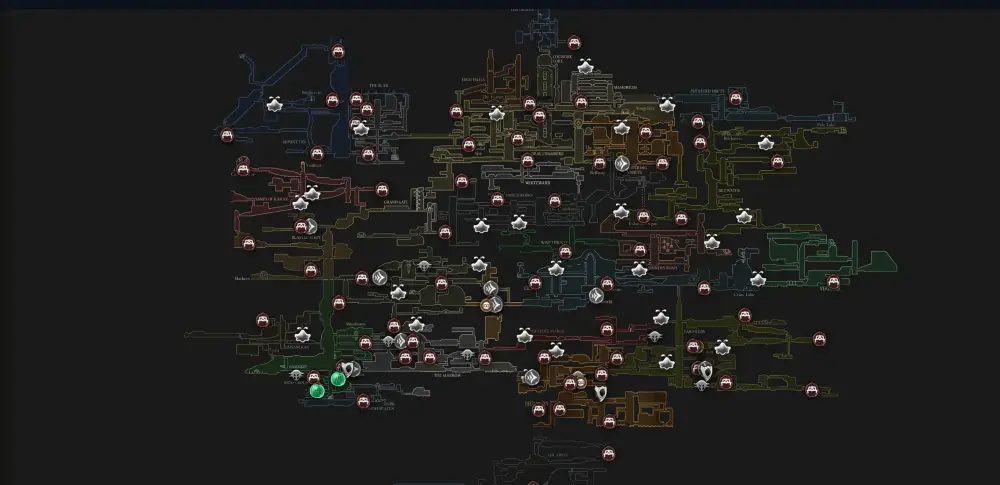
Overview
Far Fields is a sprawling, wind-swept region in Hollow Knight: Silksong featuring towering vertical chambers, powerful updrafts, and industrial structures scattered across vast plains. This intermediate area serves as a crucial progression zone between the Deep Docks and Greymoor, offering players their first taste of advanced traversal mechanics and challenging boss encounters.
The region is characterized by:
- Vertical Architecture: Multi-story chambers with complex updraft systems
- Wind Mechanics: Strong air currents that affect movement and combat
- Industrial Elements: Ancient machinery and metal structures throughout
- Key NPCs: Shakra (map vendor) and the Seamstress (quest giver)
- Major Boss: Fourth Chorus - a challenging multi-phase encounter
Map Highlights & Key Locations
Essential Facilities
- Benches: Multiple rest points including the main updraft chamber bench and eastward route benches for safe progression
- Via Bells: Fast travel stations accessible after defeating the Bell Beast
- Shakra's Shop: Map vendor selling Far Fields map, Quill, and Compass for navigation
- Seamstress Chamber: Underground location for the Flexile Spines quest line
Notable Areas
- Main Updraft Chamber: Central vertical shaft with powerful wind currents
- Pilgrim's Rest: Hidden area with locked door and secret rewards
- Fourth Chorus Arena: Boss chamber accessible after completing wind gliding quest
- Weavenest Cindril: Secret area containing valuable pickups and lore
- Eastern Passages: Connection routes leading toward Greymoor region
Get the Far Fields Map (Shakra Guide)
Finding Shakra's Shop
- Entry Route: From Deep Docks, take the lower-right exit into Far Fields and head east
- Navigate to Main Chamber: Follow the path until you reach the tall vertical chamber with strong updrafts
- Locate the Alcove: Drop down into the small right-hand alcove - you'll hear Shakra's distinctive humming
- Purchase Items: Buy the Far Fields map (essential for navigation) and consider the Quill/Compass combo for full mapping functionality
Shakra's Inventory
- Far Fields Map: Reveals the area layout and room connections
- Quill: Enables automatic room mapping as you explore
- Compass: Shows your current position on the map
- Cost: Varies by item, bring sufficient Rosaries
Important Notes
- Nearby Bench: Rest point located above Shakra's alcove for progress saving
- Audio Cues: Listen for humming sounds to locate her shop
- Alternative Meeting: If you miss Shakra here, she can be found in other locations later
Hazards & Advanced Traversal Mechanics
Wind Dynamics & Updrafts
- Updraft Control: Use short hops and precise ledge positioning to avoid being blown into enemies
- Wind Prediction: Learn updraft patterns to time jumps and dashes effectively
- Drift Management: Maintain mid-platform positioning to preserve reaction time for threats
Traversal Challenges
- Narrow Ledges: Avoid over-dashing; use controlled movements near platform edges
- Vertical Navigation: Clear enemies before committing to long climbs for safety
- Environmental Hazards: Watch for falling debris and industrial machinery
- Pickup Recovery: Fallen items are easier to retrieve with proper wind current knowledge
Wind Gliding Mechanics
Once you obtain the Drifter's Cloak from the Seamstress:
- Extended Air Time: Hold jump to glide using wind currents
- Directional Control: Use movement inputs to navigate while gliding
- Landing Precision: Master controlled descents to reach specific platforms
Route Tips
- First loop: Secure the map from Shakra, rest at the bench, then scout adjacent rooms for benches and bells.
- Progression links: Far Fields provides routes toward higher regions; some paths benefit from later mobility, so mark tricky verticals for a return.
- Currency: Farm Rosaries on short loops if you’re short on mapping items; see Rosaries guide.
Secrets & Pickups (Early)
- Side rooms off the updraft shaft hide minor pickups and a few carriers.
- Listen for audio cues (hums, chimes) to locate merchants and interactables.
Related Guides
- /guides/areas/deep-docks
- /guides/areas/greymoor
- /guides/currencies/rosaries
- /guides/routes/100-percent-map
FAQ
- Where do I buy the Far Fields map? From Shakra, in a right‑hand alcove of the tall updraft chamber.
- How much does it cost? Bring Rosaries; prices vary by item and progression.
- Why doesn’t my map fill in? Rest at a bench after purchasing a Quill; add a Compass to see your position.
Source Video
Open Interactive Map (All Areas)
Opens the full interactive Silksong map in a new tab.

